Friday, February 17, 2012

Unwelcome Guests

Sophie and I had a nice quiet rainy day to ourselves so I could unpack some more stuff in my apartment.  There is still more to do.  I can't believe I have so much JUNK!  Anyways..We have only been here in the apartment twice while it was raining and both times we have had a visitor. 

I have named him Henry because I think it's pretty obvious that is his name.

I knocked on the sliding glass door to make sure he was alive and he gave me the most annoyed catlike look.  How dare I disturb his slumber?  Well he had bigger worries... Sophie.
 
Okay so maybe Sophie was concerned about this unwanted guest, but Henry was not amused.  He was just trying to get out of the rain and get in a little catnap.


Henry is still not interested, but Sophie is trying to find a way to get to him!

Her typical, if I put my nose in the door crack and sniff loudly and repeatedly, maybe it will open.   NOT.

Henry may have been Sophie's unwanted guest, but as I was documenting our fluffy our visitor, I noticed this large saltine cracker-sized spider (yes I do realize that's an odd comparison, but hey that was my first thought and it works). 

Henry left as soon as the rain let up, but I'm sure he'll be back this weekend because we are forecasted to get some more rain.   The spider who I will now call Cracker lives to see another day mainly because it was too cold outside for me to put forth the effort of squishing him.  I am tired of cold and looking forward to SPRING!!  :)  Have a happy day!

Thursday, February 16, 2012

Officially an Occupational Therapist!

I'm so excited!  I found out today that I passed my National Boards for Occupational Therapy!  My state License should not be too far behind and then I start work in a little over a week! YAY! :)

Tuesday, February 14, 2012

Happy Valentine's Day (DIY Love Coupons)

This is my first and hopefully only Valentine's Day as an engaged couple.  Oh Wedding planning...   Chris and I don't ever buy eachother gifts for V-day, but we do spend time together and typically do dinner and exchange cards.  I wanted to give him something a little interactive this year and easy on the wallet.  All I used was my printer, a ribbon, and some construction paper.  All of which I already had.

 I made Love coupons.  I made my own template using Microsoft PPT.

I made 8 different coupons.  Here is an example of one. 
They all say "Feeling <adjective>?"  The ones I have made are personal to Chris and I so won't share all my specific Coupons, but you can get really creative with these and the more personal they are, the better.  I am certain he will have fun redeeming these coupons!  (I did put an expiration date on these...hehe)

 This whole Valentine thing bores Sophie...
 They say that a way to a man's heart is through his stomach and Chris definitely has a sweet tooth.  I made a heart-shaped brownie for Chris (his favorite).  Note the heart shaped brownie and ofcourse Sophie basking in the sun.

"Mom, Stop taking pictures of me."

"Did you just take another photo of me?!?!"


"Alright, Enough of this... I'm leaving."


Heart Brownie + Love Coupons = Happy VALENTINE's DAY!! <3


Saturday, February 11, 2012

DIY Laundry Gift Basket


My mom and I are going to a bridal shower tomorrow for my best friend Ashley.  We did not want to do the same ol' same ol' wrapped present with item that the couple registered for.  Don't get me wrong, that is perfectly fine, but that is not how we roll!  We did get her something off of her registry, but we added some more items to stick with our laundry theme.  ENJOY!


Items in Basket:
  • Shark Steam Iron (On couple's registry)
  • Clorox Bleach (Bride's FAVORITE!)
  • Laundry Detergent
  • Snuggle Fabric Softener
  • Shout Stain Remover
  • Lingerie Bag for Washing Machine
  • Drying bag for shoes (The bride and groom both work in the medical field so it is absolutely necessary to wash/dry their tennis shoes often.  This way they will not have that awful noise from banging shoes because the shoes stay on the door of the dryer.  Super cool!)
 I also included this personalized hanger that you see on ETSY that she can use on her wedding day.  You can see in later pictures that I added a blue bow to the top to go with our basket colors.  I will add a tutorial on how to make this soon because I will be making these for my wedding!!! :)


To decorate the laundry basket, I got the idea to make rosettes out of socks that were left behind in the laundry.  You can see the tutorial on how I made these here.  I hotglued three sock rosettes together then attached them to a blue ribbon.

 I wrapped the ribbon in and out of the basket.   I connected the ends of the ribbon with a dab of hot glue.  I did not want to glue the ribbon or flowers to the laundry basket so that she can actually use it in the future.

Here are some pictures of the finished product.  Hope she likes it!


This was a fun project that my mom and I got to do together.  There are so many themed baskets that you could do and since so many of my friends are getting hitched soon, we will have plenty of opportunities to make baskets and I will post them all here!  Have a wonderful day!  :)

Sock Rosette {Tutorial}


Yes…Most people make rosettes out of beautiful scrap fabrics, but no not me.  I used those sad lonely socks that you find randomly in the laundry room. Everyone has at least one or two of these mysterious socks!  I got the idea to make sock rosettes when my mom and I were making a bridal shower gift basket for my best friend.  (I will post this soon.)  Here is a quick tutorial on how to make these!  You could use this tutorial to make rosettes out of most any fabric. 
I started with a lone sock.  You can use long tube socks to make larger rosettes and no-show socks to make smaller rosettes. 

Cut the sock down the “imaginary’ seams to the toe.  Tip: Make small slits on both sides of the toe area to make the sock as flat as possible.  Fold the sock in half (hot dog style). 

Tie a loose knot in one end of the sock.

 
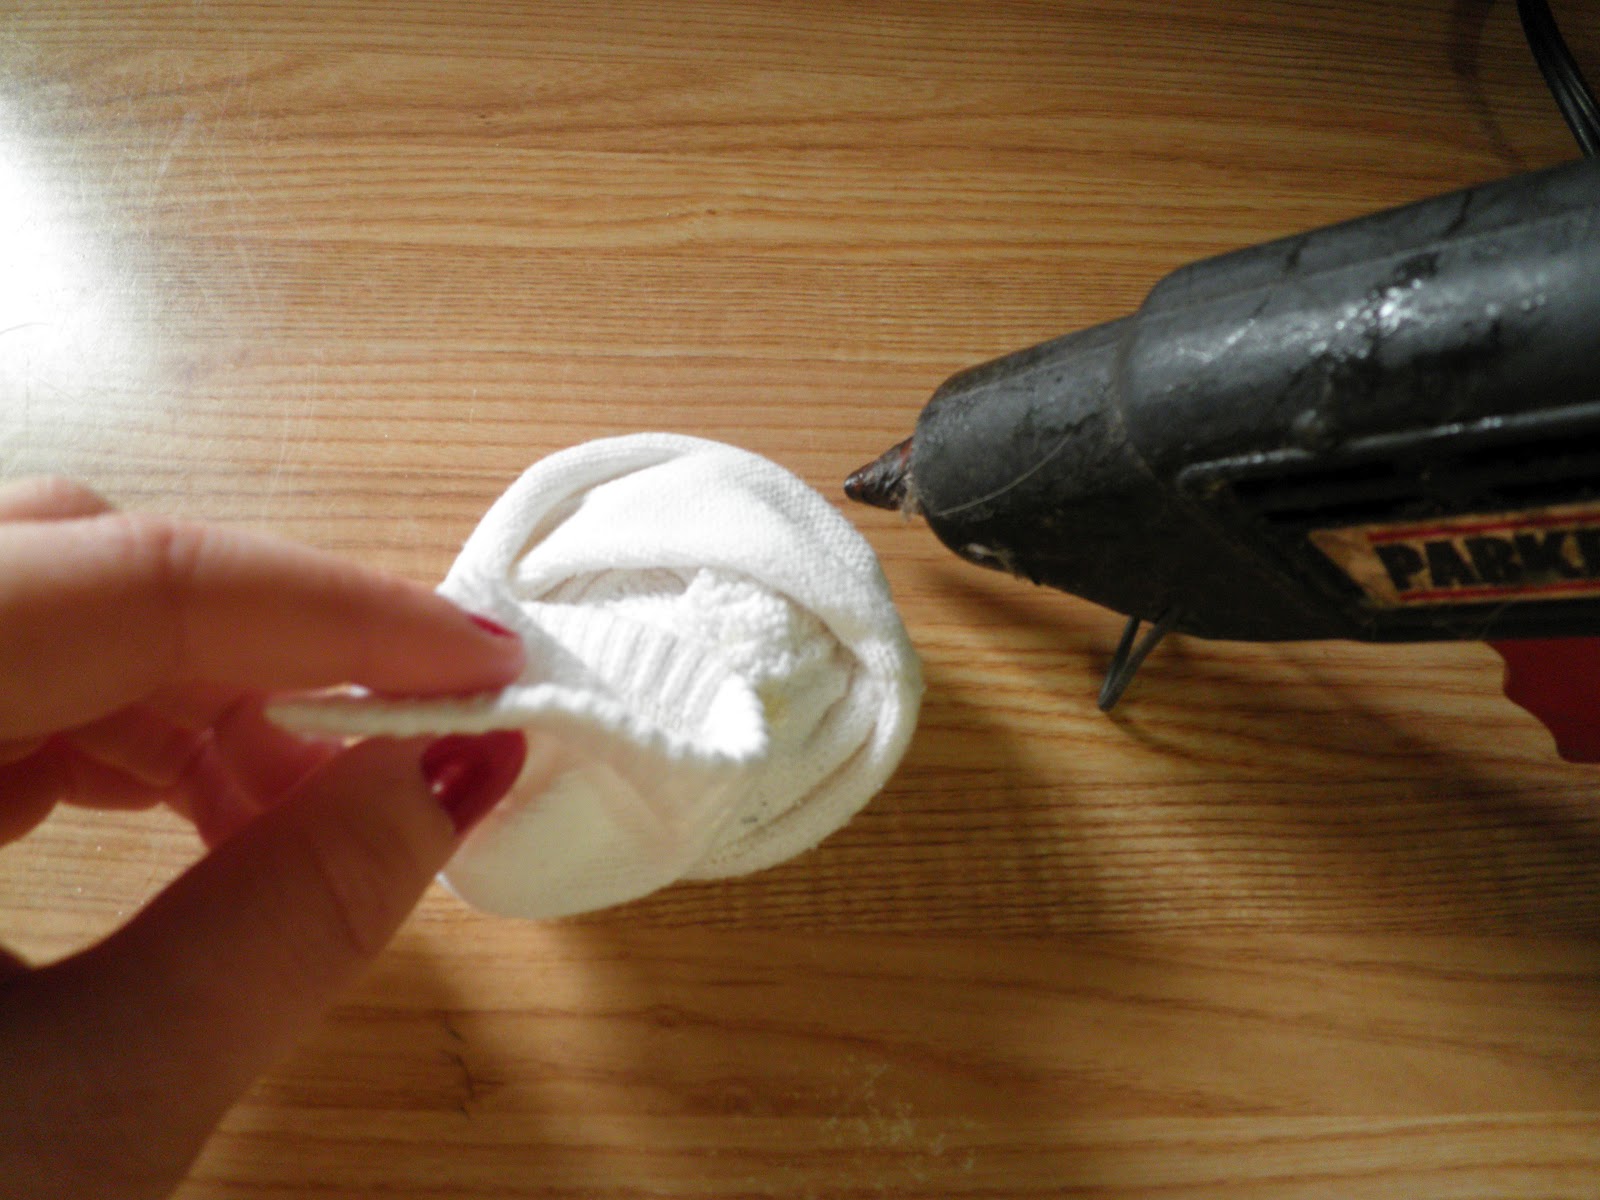
Start to wrap sock fabric around knot semi-tightly while covering the loose fabric at the end of the knot.  While wrapping, twist fabric to create petals. 
Tip:  Always twist in the same direction. 

Keep wrapping/twisting until you come to the end or the rosette is the size you want. 

Do one final twist and tuck the remaining fabric under the back of the rosette.  Secure it with a dot of hot glue.

Now you have your very own SOCK ROSETTE!  It's Simple, Easy, and CHEAP!  My Favorite!

Saturday, February 4, 2012

2012...Off to an Amazing Start!

Already February and this is the first time I've sat down to post on my blog!  This new little website that you may have heard of, Pinterest, has taken up a lot of my blogging time.  Many things have happened since my last post.  I finished my fieldwork in Wilmington and graduated with my Masters in Occupational Therapy!


Rebecca and I after the Ceremony


The week after graduation, I accepted my first big girl job offer at Vidant Medical Center (formerly PCMH).  I was not totally excited about moving from Wilmington back to Greenville, but fortunately I can be closer to Chris.  Especially now because...WE ARE ENGAGED!!!  
Engaged in Banner Elk on January (Friday) the 13th

I just took my national boards and am waiting for the outcome.  I will not start work for another 3 weeks.  I am looking forward to some time for wedding planning and crafting.  Now I just need to find a venue!  Exciting things happening so I will continue to update my blog!  :)

Wednesday, November 23, 2011

Thanksgiving Placecards

We are hosting Thanksgiving for my family at my parent's house this year.  I am so excited for some yummy food and getting to see all of my family!  This has also brought out some craftiness in me.   More to come....  Here are the placecards I made from scrapbook paper, cardstock, and buttons.  So Easy and CUTE!


 Here are mine and my mom's placecards.


The Thomas Family

All 12 for Thanksgiving Dinner!!!


I am so thankful for my family...HAPPY THANKSGIVING!!